Picture an engineer hunched over a circuit board in a lab, carefully checking if the device comes to life. Integration Gates are those suspenseful moments in IoT development when all the pieces are finally combined and tested together.
By the time you reach Stage 5: Integration, you’ve built hardware prototypes (from Stage 3) and developed iterative software/firmware builds (from Stage 4). Now it’s showtime – hardware, firmware, cloud services, and user applications all meet each other. Integration Gates are the key milestones in this stage – think of them like “checkpoint bosses” in a video game. You don’t advance to the next level until you’ve proven certain capabilities at each gate. These gates turn what could be a scary big-bang system integration into a step-by-step confidence builder. It’s a mix of excitement and anxiety as you power everything on and watch for sparks (hopefully only metaphorical ones!). The idea is to catch problems early and incrementally, rather than discovering a pile of issues right before launch. Given that IoT products involve multiple components developed somewhat independently – hardware, firmware, cloud, mobile apps – unexpected compatibility issues often pop up when everything is integrated. Integration Gates help prevent “half-baked” subsystems from cluttering up the final system by enforcing that each piece meets certain criteria before moving on.
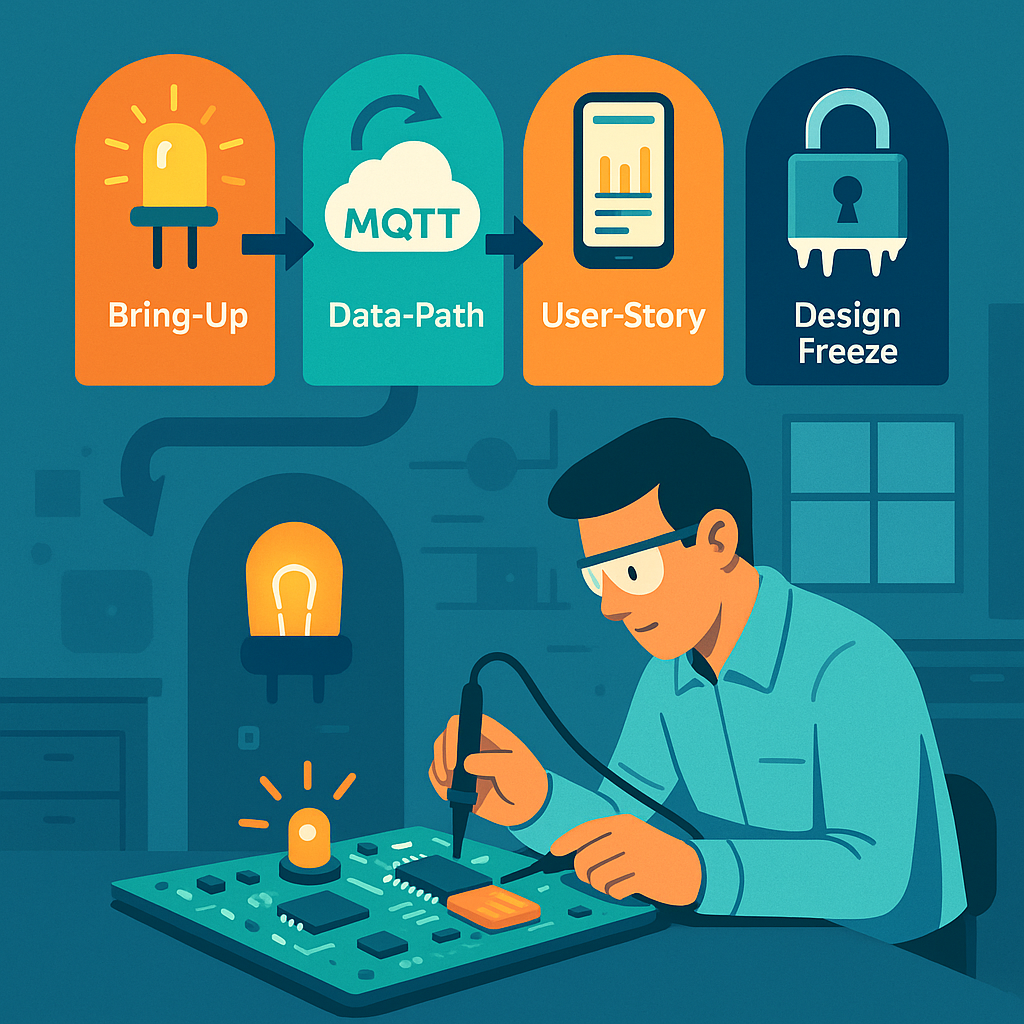
Let’s walk through the typical integration gates in an IoT project, and see why each is important. At each gate, we’ll verify that different parts of the system “play nice” together:
Bring-Up Gate – Getting the Basics Working
The first sign of life – a simple dev board with an LED blinking is often the Hello World of hardware integration.
The Bring-Up Gate is the first (and very basic) integration test with the real hardware. The goal at this gate is humble and fundamental: Does the microcontroller (MCU) on our board boot up and run code? This is akin to checking the patient’s pulse 🩺 – is the device alive at all? Here’s what happens at this gate:
- Flashing Firmware & Booting: You attempt to flash the initial firmware onto the device and then reset it. Does it start executing code? A common practice is to load a firmware that makes an LED blink or sends a simple
"Hello, world"message over a serial console. If you see that little LED blinking on your board, you know the heart is beating. It confirms that the core hardware (power supply, clock, MCU) is operational and that your programming toolchain can successfully load code into the device’s memory. - Basic Hardware Functionality: Next, you check that the device can perform a few rudimentary tasks on its own. For example, can it read a basic sensor on the board or at least measure something like its own battery level or supply voltage? Can it communicate over a debug interface (such as printing to a serial console or logger)? At this point, you’re ensuring that fundamental I/O and peripherals are working – e.g. GPIO pins can toggle (hence the LED blink test), the CPU isn’t crashing, and maybe the buttons or basic sensors respond.
Essentially, the Bring-Up Gate is confirming the board is not a “brick.” Passing this gate means the patient is alive and responsive: the hardware is powered properly, the MCU runs code, and you have a working line of communication for further testing. This might sound trivial, but it’s a huge relief the first time it happens. Often, engineers hold their breath when powering on a custom board for the first time – if something is wrong (say, a miswired power rail or an incorrectly soldered chip), the board might do nothing or show erratic behavior. By blinking an LED or printing a message, you’re victoriously yelling, “It lives!”
Why it matters: Bring-up is the safety net that catches fundamental issues early. If the board doesn’t boot or the firmware can’t run, that’s a show-stopper which you need to fix now. Maybe the power circuitry is faulty, or the oscillator for the clock isn’t oscillating – better to find out immediately. Only after you pass this gate do you proceed to more complex integration. In project terms, this gate verifies some of the most basic requirements (remember those Stage 1 specs about hardware power and processing?). It ensures your hardware design and basic firmware can support the next steps. After a successful Bring-Up Gate, you can confidently say, “Alright, the lights are on and someone’s home. Onward to sending some real data!”
Data-Path Gate – From Device to Cloud (The Core Journey)
After confirming the device is alive, it’s time to test the core reason the whole IoT system exists: getting sensor data from the device all the way to the cloud. The Data-Path Gate focuses on the end-to-end data pipeline. This is where you prove that your IoT device can actually fulfill its primary mission of collecting data and transmitting it to a backend service.
Imagine our device is a temperature sensor. At the Data-Path Gate, you would do something like this: trigger the sensor to take a reading (perhaps by heating the sensor slightly or simulating a change in temperature), and then watch the system to see that this reading travels from the sensor -> device -> network -> cloud -> database. It’s a full vertical slice of functionality. You want to verify a number of things along this path:
- Sensor Integration: The firmware is able to read data from the sensor correctly. For instance, if the sensor says the room is 25°C, the device’s software should obtain that value (and maybe timestamp it).
- Network Transmission: The device successfully sends the data over its communication interface. Whether it’s Bluetooth Low Energy, Wi-Fi, cellular, LoRaWAN, or another wireless link, that radio or network module needs to work now. At this gate, you test that the device can connect to the network (pair with a gateway or join Wi-Fi, connect to cellular, etc.) and actually transmit the sensor data outward. You might send the data as a packet via MQTT, HTTP, or whatever protocol your IoT system uses.
- Cloud Reception and Storage: On the other end of that transmission, your cloud backend (server, IoT platform, etc.) should receive the data and deposit it in the right place – for example, in a cloud database, data lake, or time-series storage. Here you’ll check that the data arrives intact and is stored or queued as expected. If the temperature was 25°C, does the cloud record show 25°C (and not some gibberish)? Are the timestamps correct?
A typical IoT data path: devices gather sensor readings, communicate over the internet, and update cloud services or databases, which in turn feed user applications. The Data-Path Gate proves this whole pipeline works in your product.
Passing the Data-Path Gate usually means the end-to-end data pipeline works in practice, not just in theory. It’s a major milestone because it demonstrates that your architecture is sound: the device’s hardware and firmware can talk to the cloud infrastructure. Essentially, you’ve shown that “Yes, our device actually talks to our cloud!” and that the fundamental value proposition – collecting data remotely – is achievable.
During this phase, you also evaluate data quality and performance: Are the sensor readings making it to the cloud in a timely manner? For example, if your requirement was to send an update every 10 minutes, check that this interval is being met. Verify that the data isn’t corrupted or lost in transit. Perhaps you generate a known test pattern or range of sensor values and confirm the cloud receives the same pattern. If something is off (maybe the values look wrong due to a unit conversion bug, or messages take too long due to network issues), you catch it now. It’s much easier to tweak and fix these issues at this stage than to discover later that your device has been silently dropping data.
Real-world example: Suppose you have a humidity sensor that should send data every 10 minutes. At the data-path test, you notice the cloud is receiving irregular updates – sometimes 10 minutes, sometimes 30 minutes apart. Investigating now might reveal a power-saving feature in the firmware that put the device to sleep longer than expected, or perhaps a connectivity dropout. You can then adjust the firmware or network settings before proceeding. Without a Data-Path Gate, such a problem might only be noticed during a full system test or pilot trial, which could be chaotic to debug.
In terms of requirements, by the time you pass the Data-Path Gate, all those specifications related to data transmission and sensing (the ones defined back in Stage 1) should be verified as “met in testing.” You can check off requirements like “Device shall transmit temperature readings to cloud database within X minutes of sensing” as done. This gives everyone confidence that the backbone of the IoT system is solid.
User-Story Gate – End-to-End User Experience Check
Now we step fully into the user’s shoes. It’s not enough that data lives in a cloud database – the User-Story Gate asks: Can a real end user actually benefit from this data? In other words, does the whole system deliver a meaningful use case from the user’s perspective.
At this gate, you integrate the front-end application (which could be a mobile app, web app, or other user interface) with the rest of the system. The idea is to demonstrate a real-world scenario or user story working seamlessly with your IoT device and cloud. For example, a common user story might be:
“As a user, I open the mobile app and see the current temperature reading from my device, and I get an alert if the temperature exceeds 30°C.”
To pass the User-Story Gate, you would actually do that:
- Open the app or dashboard as an end user.
- Confirm that you can view the live data coming from the device (which, thanks to passing the Data-Path Gate, is populating the cloud backend).
- Perhaps manipulate something to trigger an alert or action: for instance, force the temperature high and see if the system sends a notification or highlights the reading in the app’s UI.
In practice, this might involve building a simple UI screen that fetches data from your cloud database or via an API. If our product is an IoT home thermostat, the user-story test might involve seeing the current temperature on a smartphone app, along with a graph of the last 24 hours, and maybe toggling a setting to ensure the device can receive commands too (if applicable). The key is that the product becomes demo-able in a meaningful way. You could take your device and app to a non-engineer – say a project stakeholder or a friendly beta tester – and they would be able to use it in a basic but real scenario.
Why it matters: This gate is often the first time everything (hardware, firmware, cloud, and user interface) is working together. It’s a true integration test of the full system including the human element. From a development perspective, it forces the team to connect all the dots:
- The app needs to have the correct endpoints or database access to retrieve the data.
- The cloud backend needs to expose the data in a form the app can use (for example, REST API or WebSocket).
- You also check that data is not only present but makes sense to the user. Is the unit of measure clear? Is the data updated reasonably fast on the UI after the device sends it? If a user has to wait too long to see an update, that might be a problem to address (maybe the update frequency needs tuning or the app needs to poll more often or use push notifications).
By passing the User-Story Gate, you demonstrate that your IoT product isn’t just a theoretical system—it actually delivers value to an end user. This is a huge morale booster for the team. It’s often the point where the project becomes real for people outside the dev team. You might gather around to show the company’s product manager, “Look, here’s your data on the app!” and that’s a moment of celebration.
From a project management angle, at this gate you’ll verify requirements related to user experience. For example, if you had a requirement that “A user shall be able to view the device’s readings remotely via a mobile application”, well, now you can mark that as tested and met. You might also test basic user-level functionality like account login, device provisioning (did the user need to pair the device or add it to their account?), and any alerts or notifications. Essentially, you’re checking off the user-facing functionality items on your checklist.
Additionally, this gate can reveal any last-mile issues: maybe the data format needs tweaking for the UI, or perhaps you discover that the average user can’t interpret a raw sensor reading and you decide to add some more info or adjust the UI. Those insights are invaluable and are much easier to handle now than if discovered after a product launch.
Design-Freeze Gate – Locking Down the Final Design
The Design-Freeze Gate is a slightly different beast than the previous integration gates. Up to now, each gate was about demonstrating new end-to-end capabilities. Design freeze, however, is about reaching a point of confidence and saying, “Alright, no more big changes – this is the design we’re going to finalize and push towards production.” In the context of an IoT project, this typically means both the hardware design and the firmware/software feature set are declared “frozen” (no further changes except critical fixes).
By the time you’re approaching design freeze, you’ve likely gone through one or more iterations of your hardware. For example, you might have built an EVT (Engineering Validation Test) prototype and then a DVT (Design Validation Test) unit in earlier stages. Each iteration got you closer to the final form. A design freeze generally happens when you believe the current design is good enough to advance into the final manufacturing steps. This includes things like ordering the production PCBs, committing to the enclosure design and tooling, and finalizing the component selection. On the firmware side, design freeze means you have implemented all planned features – from here on out, you plan to do only bug fixes, optimizations, or cosmetic tweaks. No new features that would alter the system’s behavior in a major way.
Why freeze the design? Because after this point, changes become very expensive or time-consuming. Imagine you freeze and then send your PCB design out for a mass production run of 10,000 units, and then you realize you forgot a critical sensor or wired something incorrectly – that’s a nightmare scenario. The goal is to avoid that by thoroughly vetting the design before freezing. Once you freeze, any modification might mean spinning a new circuit board (with all the cost and delay that entails) or updating a mold for the enclosure, or redoing certifications. One manufacturing guide notes that by the final pre-production stage (often called PVT – Production Validation Test), the product design is indeed “frozen” because it’s already been validated by prior testing (EVT/DVT) and changes at that point could disrupt the production linetitoma.com. In other words, you freeze when you are confident that the design meets requirements and can be produced at scale without issues.
Before declaring design freeze, teams often perform a comprehensive review. This might involve revisiting the original requirements and verifying that every single requirement has been addressed and tested at least once. Any outstanding issues should be very minor or have acceptable workarounds. For example, maybe during DVT you discovered a minor issue like an LED being a bit dim – but it doesn’t affect functionality, and you decide that’s acceptable. Or perhaps a certain sensor’s reading was slightly noisy, and you addressed it in firmware by averaging readings. The design freeze review will catalog all these findings and solutions. It’s also common to run final performance tests and reliability tests at this stage (like battery life measurements, environmental tests, etc.) to be sure nothing was overlooked.
A part of design freeze is also ensuring you meet all regulatory and certification requirements. By now, you should have either completed or be ready to complete tests for things like EMC (electromagnetic compatibility), safety (e.g. UL certification), radio certifications (FCC, CE, etc.), and any industry-specific standards. The hardware design should include any tweaks needed to pass these (for instance, added shielding or filter components to reduce noise, which you would have verified in DVT). Once you freeze, you’ll send hardware off for official certification if you haven’t already – doing that after freeze is logical because you don’t plan to change the design that could alter compliance.
Passing the Design-Freeze Gate is a significant milestone. It signals that the team believes the current product design meets the requirements well enough to proceed to manufacturing and launch. After this gate, the project typically moves into a new phase: building pilot production units, final verification testing on those units (often called PVT as mentioned), and ramping up manufacturing. The mindset shifts from development to production and deployment.
In summary, at Design-Freeze Gate, you lock in the following:
- Hardware is final: No further changes to schematics or PCB layout. You’re ready to order the “real” manufacturing run with this design. (If a problem is found later, it might result in a Version 2.0 down the road or a patch, but not now).
- Firmware is feature-complete: All planned features are implemented. Any new ideas go to a future roadmap; for now, you focus on fixing bugs and polishing what’s there. You might branch the code in version control, labeling this as a release candidate.
- Documentation is updated: You’ll freeze things like the BOM (bill of materials), production test plans, user manuals drafts, etc., reflecting the final design.
- No loose ends in requirements: The requirement checklist from Stage 1 should be essentially all green. Maybe a few low-priority enhancements are deferred, but anything critical is done or you consciously sign off that it won’t be done.
Design freeze can feel a bit nerve-wracking – you’re essentially betting that you’re satisfied enough with the product to go out to the world. But it’s also exciting; it means you’re entering the home stretch of the project.
Managing Integration Gates and Reviews (Staying on Track)
How do teams actually manage these gates? Typically, milestone review meetings are held at each gate. The format is often formal: you gather the key stakeholders (product managers, engineers, QA, etc.) and review a checklist of criteria that must be met for the gate. Remember those Stage 1 requirements and the acceptance tests or verification methods you defined for each? This is where they become really useful. For each integration gate, you map which requirements or goals should now be fulfilled and verified.
For example:
- Before Bring-Up Gate: Requirements about basic hardware functionality (e.g., “MCU shall boot and execute firmware”, “Device shall provide a hardware interface for debugging”) should be tested and checked off.
- By Data-Path Gate: All requirements related to sensor data capture and transmission (e.g., “Device shall measure temperature within ±1°C accuracy”, “Device shall transmit data via Wi-Fi to cloud within 1 minute”) must show as met. You would demonstrate tests for each of those during the review.
- By User-Story Gate: Requirements related to user interactions (e.g., “User shall be able to view current and 24h history of data via the app”, “System shall alert user when data goes out of range”) should be completed and demonstrated.
- By Design-Freeze Gate: Essentially all remaining requirements should be either met or formally agreed to be out-of-scope. This includes hardware durability, regulatory compliance, battery life, etc. Also, any open bugs of severity High/Critical should be resolved or have a plan, since after this you don’t want surprises.
During the gate review, each item on the checklist is discussed. If it’s met, great – you provide evidence (test results, demo, etc.). If something is not met, the team has to decide: is this a deal-breaker for moving forward? In a disciplined process, you do not simply wave it off with “Oh, we’ll fix that later, let’s move on.” Instead, you log it as an action item and address it before fully considering the gate passed. Maybe it means delaying the schedule slightly to fix the issue or come up with a workaround. This discipline prevents a pile-up of unresolved problems at the very end. It’s so tempting to say “That part’s not working yet, but it’s minor, we’ll handle it eventually.” The integration gate approach urges you to resist that temptation! Each gate is like a safety net catching problems when they’re easier (and cheaper) to fix – i.e., now, not when you’re in a panic right before launch.
Teams often use project tracking tools or simply spreadsheets for these checklists. For instance, you might have a spreadsheet with all requirements as rows, and columns indicating status at Bring-Up test, Data-Path test, etc. It provides a clear snapshot of where you stand at each milestone. Some organizations also assign a “gatekeeper” role – a person (or committee) who must sign off that the criteria are met. This ensures accountability. It’s not meant to be bureaucracy for its own sake, but rather a way to maintain quality and avoid rushing ahead with latent flaws.
Another practice at integration gates is to reflect on lessons learned so far. Maybe at the Data-Path Gate review, the team discusses “What problems did we hit getting data to the cloud, and how can we prevent similar issues going forward?” These discussions might lead to adjustments in the development process or test coverage for the next stages. For example, if you found a lot of problems with network connectivity, you might beef up that part of your test plan for future units or add additional monitoring.
Step-by-Step Integration vs. Big-Bang: Why Gates Matter (Wrap-Up)
Integration Gates might seem like extra checkpoints that slow things down, but in reality they de-risk your project in a big way. Without gates, you might be tempted to build each part of the system in isolation and only try everything together at the very end – that’s the classic big-bang integration. In complex IoT projects, big-bang integration is a recipe for sleepless nights and nasty surprises. By contrast, the gated approach breaks the problem into manageable chunks. At each gate, you’re effectively saying “We’re not proceeding to the next phase until we’re confident in the current one.” This approach has proven valuable in both hardware and software industries to catch issues early.
Think of it like climbing a mountain via base camps. Each Integration Gate is a base camp where you check your equipment and health before ascending higher. You wouldn’t attempt the summit if you realized you forgot your oxygen mask at base camp 2 – similarly, you don’t want to attempt full production if you haven’t verified your device can talk to the cloud since Stage 5!
By the time you hit the Design-Freeze Gate, you should feel a sense of accomplishment: you’ve systematically ironed out the major kinks. The device boots reliably, it communicates properly, users can use it and find value, and the design is solidified. Of course, the journey isn’t over – after design freeze comes stages like certification testing, pilot production runs, and eventually mass production and deployment. But thanks to the integration gates, you enter those final stages with much higher confidence. You’ve essentially built up the system’s reliability step by step, instead of throwing everything together blindly.
It’s also worth noting the positive psychological impact on the team. Each gate passed is a mini-celebration opportunity 🎉. In a long hardware project, morale can dip during the grind, so these milestones give a chance to acknowledge progress. When the first board boots up (Bring-Up Gate) – that’s often donuts or high-fives all around. When data shows up in the cloud (Data-Path Gate) – maybe a team lunch to celebrate. When the first end-to-end demo works (User-Story Gate) – that’s a huge validation of everyone’s efforts. By the final design freeze, you might finally allow yourself a toast (though perhaps hold off on the expensive champagne until everything is truly in mass production!). These small wins keep everyone motivated and aligned.
In conclusion, Stage 5: Integration Gates ensure that all the components of your IoT product “play nice” together before you move forward. They enforce a structured way to validate functionality incrementally, catch and resolve issues early, and align the team on meeting the product requirements. It transforms a potentially daunting integration process into a series of achievable steps. So when you embark on developing an IoT product, remember to tackle those checkpoint bosses one by one – you’ll save yourself a lot of headaches and have more reasons to celebrate along the way. Now, onward to the next stage (and eventually, to product launch glory)! Each gate conquered brings you one level closer to a successful IoT product. Level up! 🚀
Sources: The importance of phased validation in IoT developmenttitoma.com, and typical IoT system architecture involving devices, communications, cloud, and user apps. Integration challenges often arise when separately developed components come together – a problem mitigated by using integration gates to gatekeep progress.